
Run DeepSeek Harness as an AppVM, step by step
DeepSeek Harness is a brand-new open source AI agent, moving fast and still in developer preview. Give it a machine of its own instead of your laptop, then reach it from any browser, including a phone or a tablet.
TL;DR — DeepSeek Harness is new, open source, and changing quickly. It is built to work on your own machine, in your own files. This gives it a machine of its own instead, on a server you already have, and hands it back to you through a browser. Your laptop stays out of it.
DeepSeek Harness, dsh, is DeepSeek’s open source AI agent. It arrived
recently, it is popular already, and its own README is refreshingly direct
about where it stands:
DeepSeek Harness is currently in developer preview and is iterating rapidly. THERE WILL BE COMPATIBILITY-BREAKING CHANGES.
Every version published so far is a release candidate. That is not a criticism, it is what early looks like when a project is honest about it. It does mean the usual questions are worth asking before you install it next to everything else you care about.
Why not just run it on your laptop
A local AI agent is useful precisely because it works where your work is. It reads and writes real files, uses real credentials, and acts on your behalf in the directory you point it at. That is the product, not a flaw.
The awkward part is that “where your work is” and “where your whole life is” tend to be the same machine. Early software plus broad reach over your own filesystem is a combination worth thinking about for a minute, especially when the project itself is telling you it will break compatibility as it goes.
You have the usual options. Run it and hope. Keep a spare laptop. Or give it a computer of its own.
The third one used to mean provisioning a VM, installing an OS, keeping that OS patched, and finding a way in. This walkthrough is that option without the weight, in about ten minutes, on a server you already own.
And there is a second thing you get almost by accident. Once the agent lives on a machine of its own and answers over the network, the device in your hand stops mattering. A phone works. A tablet works. A Linux desktop works. Anything with a browser is now a client, and none of them are running the agent.
What gets built
browser ──► <vm-ip>:3080 nginx ──► 127.0.0.1:3081 dsh web
(the VM's own │
address) ├─ rewrites Host and Origin to loopback
└─ injects a crypto.randomUUID polyfill
One AppVM: a real machine with its own kernel, its own disk, and its own address
on your network, built from a container image. Inside it, dsh in the
foreground with nginx beside it.
That nginx is not a reverse proxy in the usual sense. It does no TLS, no load
balancing, and no routing. It is there for two reasons, both properties of dsh
itself rather than of AppVM, and both worth understanding before you copy the
file.
Why nginx is in the picture
dsh guards its own /api surface in two tiers. The outer tier accepts a
caller whose Host is loopback or a name the deployment has declared trusted. A
stricter inner tier accepts loopback only, and requires that any Origin the
browser sends matches that Host exactly.
The inner tier covers the two calls the first-run flow needs: choosing a model
and choosing a workspace. A browser at http://<vm-ip>:3080 sends that address
in both headers, so the inner tier refuses, and the product is unusable even
though most of the API answers normally. Pointing dsh at the LAN address does
not help, because a LAN address is still not loopback:
| Authority | agentPreset.list | settings.describe |
|---|---|---|
| localhost:3080 loopback | 200 | 200 |
| harness.example trusted name | 200 | 403 |
| 192.0.2.24:3080 untrusted address | 403 | 403 |
A trusted name reaches most of the API and still cannot reach the settings call. Only a loopback authority reaches everything.
| Host | Origin | Result | Reading |
|---|---|---|---|
| loopback | none sent | 200 | no Origin to disagree with |
| loopback | the public address | 403 | what a real browser sends |
| loopback | loopback | 200 | both rewritten, they agree |
The middle row is the one that matters. Rewrite only the host and a browser still fails, because its Origin no longer matches.
So nginx takes the network socket and re-presents each request as loopback. The
detail that matters is in the second table: it must rewrite both Host and
Origin. Rewrite only the host and a browser’s original Origin stays in
place, the two disagree, and the request is still refused.
This relaxes a check
dshputs up on purpose, for anyone who can reach the VM. It suits a home or lab network. Put a real gate in front of it anywhere else.
Why the polyfill
Browsers expose crypto.randomUUID only in a secure context, meaning HTTPS or
localhost. A plain HTTP address on your LAN is neither, and release
0.1.0-rc.6 calls that function directly, so the interface fails with
crypto.randomUUID is not a function.
Worth checking the whole client before reaching for a fix: across every bundle
the site serves, crypto.randomUUID appears in two and crypto.subtle in none.
That matters, because subtle is the one that cannot be polyfilled. Since
nothing needs it, a small version 4 shim built on crypto.getRandomValues,
which needs no secure context, closes the gap with no certificates involved.
The project has already fixed this upstream the same way, so a later release should make the shim unnecessary. It does nothing when the function exists, so it stays harmless either way. This is the kind of thing “iterating rapidly” means in practice, and it is much easier to absorb on a machine that is not yours.
Step 1: Build the image
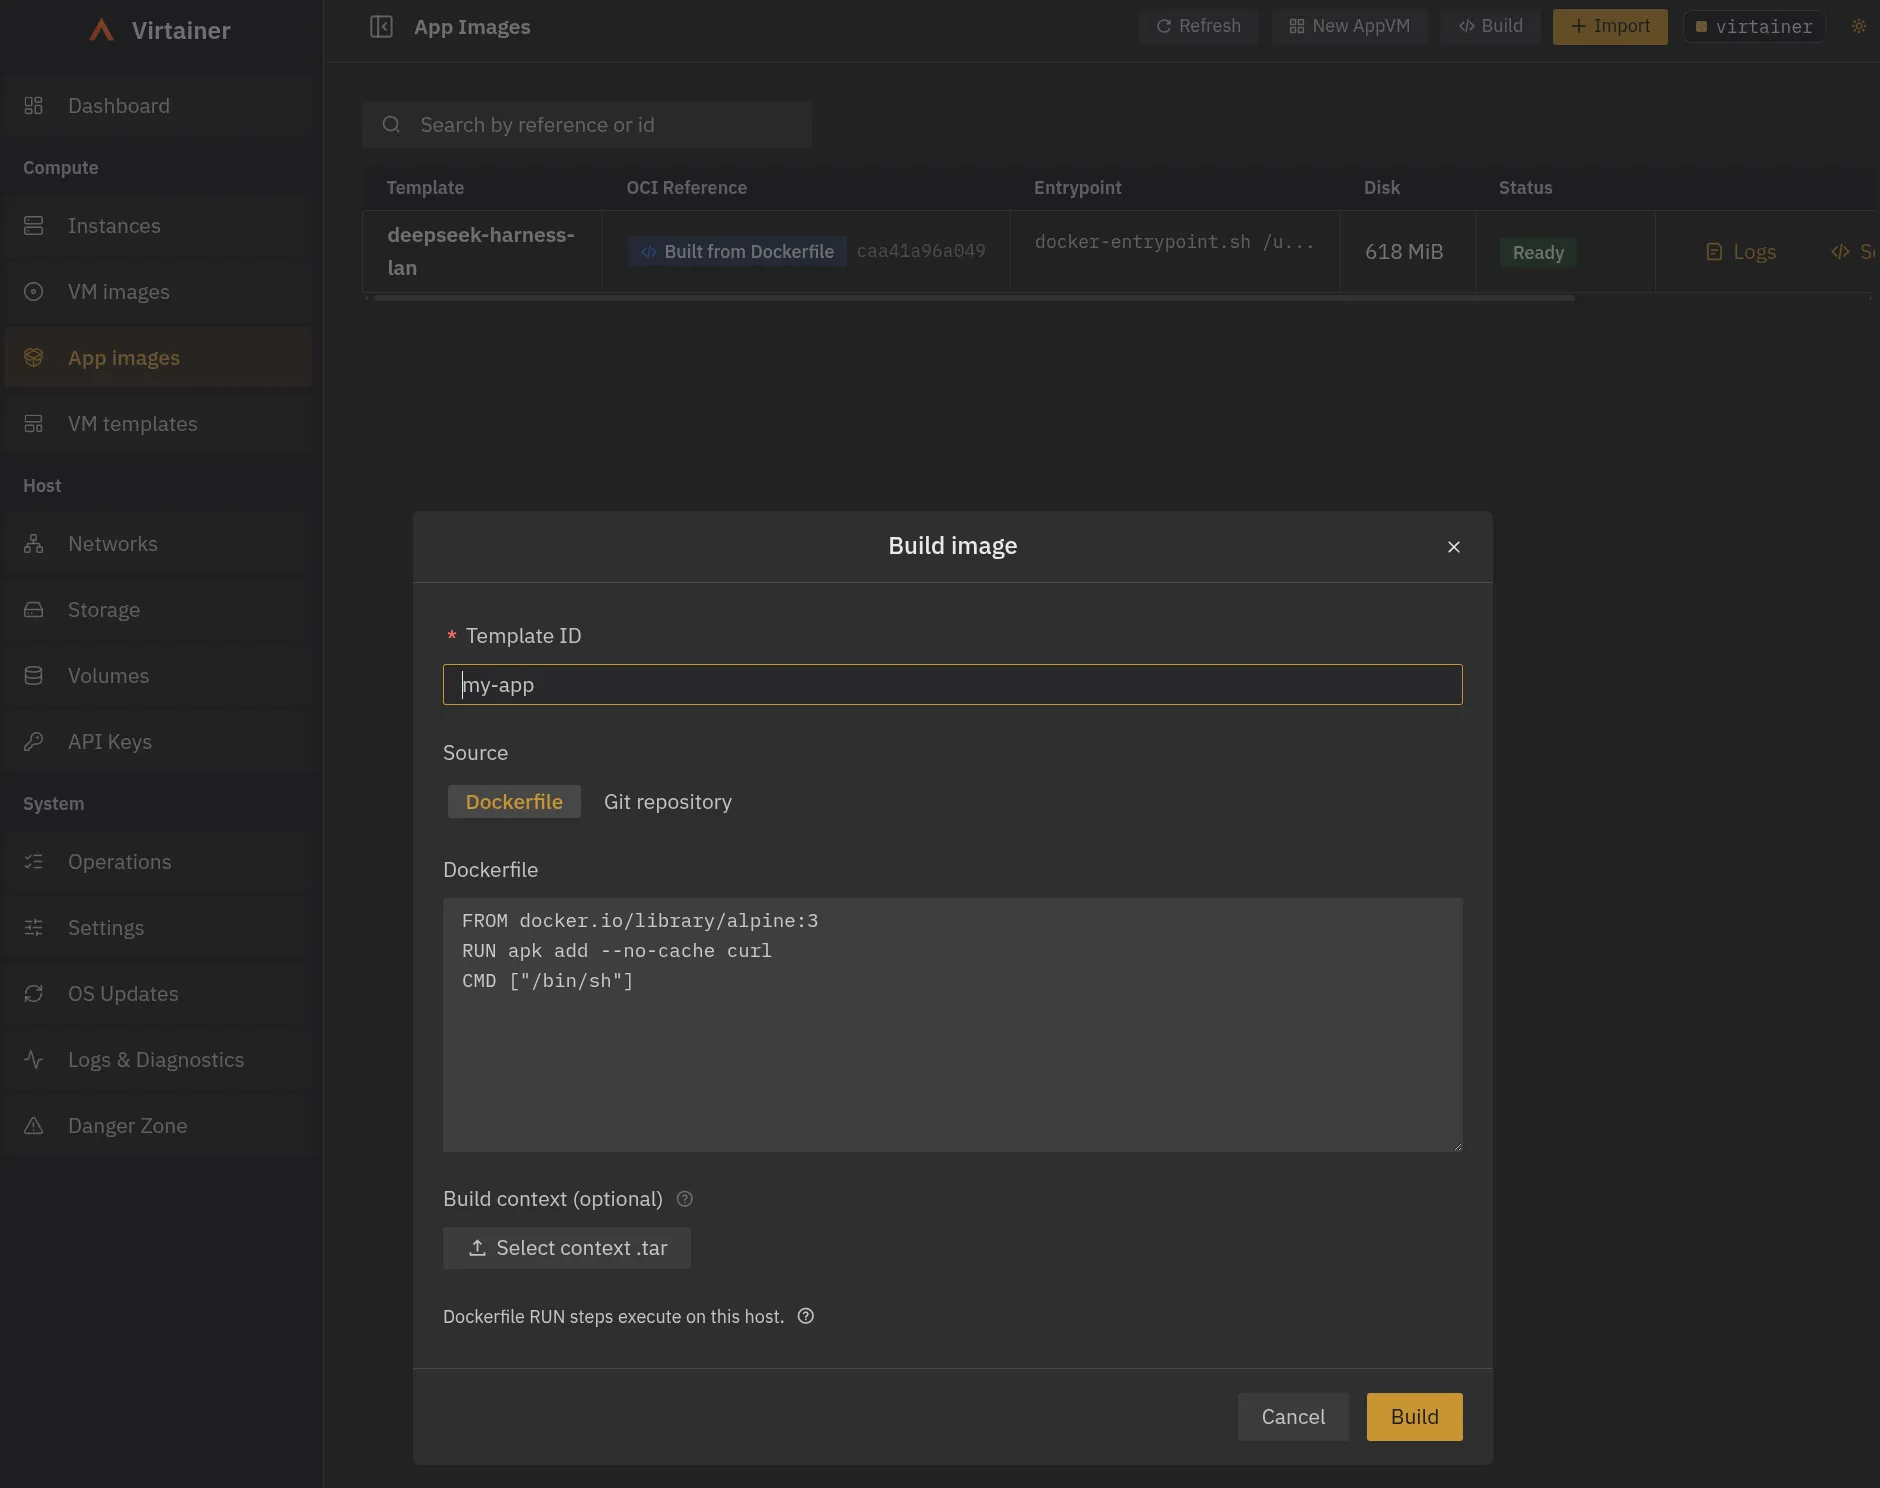
Open App images and click Build. Name the template deepseek-harness,
leave the source on Dockerfile, and paste the file below into the text area.
The build context stays empty, which is why the configuration arrives through
heredocs rather than COPY.
FROM docker.io/library/node:24-trixie-slim AS builder
RUN apt-get update \
&& apt-get install -y --no-install-recommends ca-certificates python3 make g++ \
&& rm -rf /var/lib/apt/lists/*
RUN npm install -g @deepseek-ai/dsh@0.1.0-rc.6 && npm cache clean --force
FROM docker.io/library/node:24-trixie-slim
RUN apt-get update \
&& apt-get install -y --no-install-recommends \
ca-certificates curl net-tools iproute2 procps nginx \
&& rm -rf /var/lib/apt/lists/*
COPY --from=builder /usr/local/lib/node_modules/@deepseek-ai \
/usr/local/lib/node_modules/@deepseek-ai
RUN ln -s ../lib/node_modules/@deepseek-ai/dsh/lib/bin.js /usr/local/bin/dsh \
&& dsh --version
RUN rm -f /etc/nginx/sites-enabled/default
COPY <<'CONF' /etc/nginx/conf.d/dsh.conf
map $http_upgrade $dsh_connection {
default upgrade;
'' close;
}
server {
listen 3080;
access_log off;
error_log /dev/stderr warn;
client_max_body_size 0;
location / {
proxy_pass http://127.0.0.1:3081;
# Both headers, not just Host: dsh compares them for equality.
proxy_set_header Host 127.0.0.1:3081;
proxy_set_header Origin http://127.0.0.1:3081;
proxy_set_header Sec-Fetch-Site "";
# Clearing this keeps the body uncompressed so sub_filter can see it.
# The injected script has no dollar signs, which nginx would read as
# variables.
proxy_set_header Accept-Encoding "";
sub_filter_once on;
sub_filter '<head>' '<head><script>(function(){var c=window.crypto;if(!c||typeof c.randomUUID==="function")return;function h(n){return n.toString(16).padStart(2,"0")}function u(){var b=c.getRandomValues(new Uint8Array(16));b[6]=(b[6]&15)|64;b[8]=(b[8]&63)|128;var s="";for(var i=0;i<16;i++){s+=h(b[i]);if(i===3||i===5||i===7||i===9)s+="-"}return s}try{c.randomUUID=u}catch(e){}if(typeof c.randomUUID!=="function"){try{Object.defineProperty(Crypto.prototype,"randomUUID",{value:u,configurable:true,writable:true})}catch(e){}}})();</script>';
proxy_http_version 1.1;
proxy_set_header Upgrade $http_upgrade;
proxy_set_header Connection $dsh_connection;
# dsh streams sessions, so never buffer and never time out mid-session.
proxy_buffering off;
proxy_read_timeout 3600s;
proxy_send_timeout 3600s;
}
}
CONF
COPY <<'SH' /usr/local/bin/dsh-with-proxy
#!/bin/sh
set -eu
proxy() {
# A stop signal reaches the whole process group, so leave on it rather than
# restarting nginx during shutdown.
trap 'exit 0' TERM INT
while :; do
nginx -g 'daemon off;' || true
echo "[proxy] nginx exited; restarting in 5s" >&2
sleep 5 || exit 0
done
}
proxy &
exec dsh web --port 3081 "$@"
SH
RUN chmod 0755 /usr/local/bin/dsh-with-proxy && nginx -t
ENV DSH_HOME=/root/.dsh
RUN mkdir -p "$DSH_HOME" /workspace
WORKDIR /workspace
EXPOSE 3080
HEALTHCHECK --interval=30s --timeout=10s --start-period=120s --retries=3 \
CMD curl -fsS http://127.0.0.1:3080/ >/dev/null || exit 1
CMD ["/usr/local/bin/dsh-with-proxy"]
Click Build. The dialog’s own note that RUN steps execute on this host is
worth reading twice: this is an ordinary build on your server, using its network
and its privileges. The image reaches Ready once Virtainer has flattened it
into a disk image, 618 MiB here.
Pinning 0.1.0-rc.6 is deliberate. When a project warns you it will break
compatibility, a version number in the file is how you keep today’s working
setup working tomorrow. Moving up is then a decision you make, not one that
happens to you.
Two other things in that file are AppVM decisions rather than Docker ones. dsh
stays argv[0] via the exec, so the machine’s lifecycle and the agent’s are
the same and a crash stays visible. And the image deliberately keeps a shell,
curl, iproute2, and net-tools, which is the line most people would delete
and the reason step 3 can show you anything.
The reasoning behind the rest is in Writing a Dockerfile for an AppVM.
Step 2: Create the AppVM
Go to Instances, click New AppVM, and pick the template you just built. Four vCPUs, 4096 MB and 16 GiB of disk suit this workload; the form opens on smaller defaults.
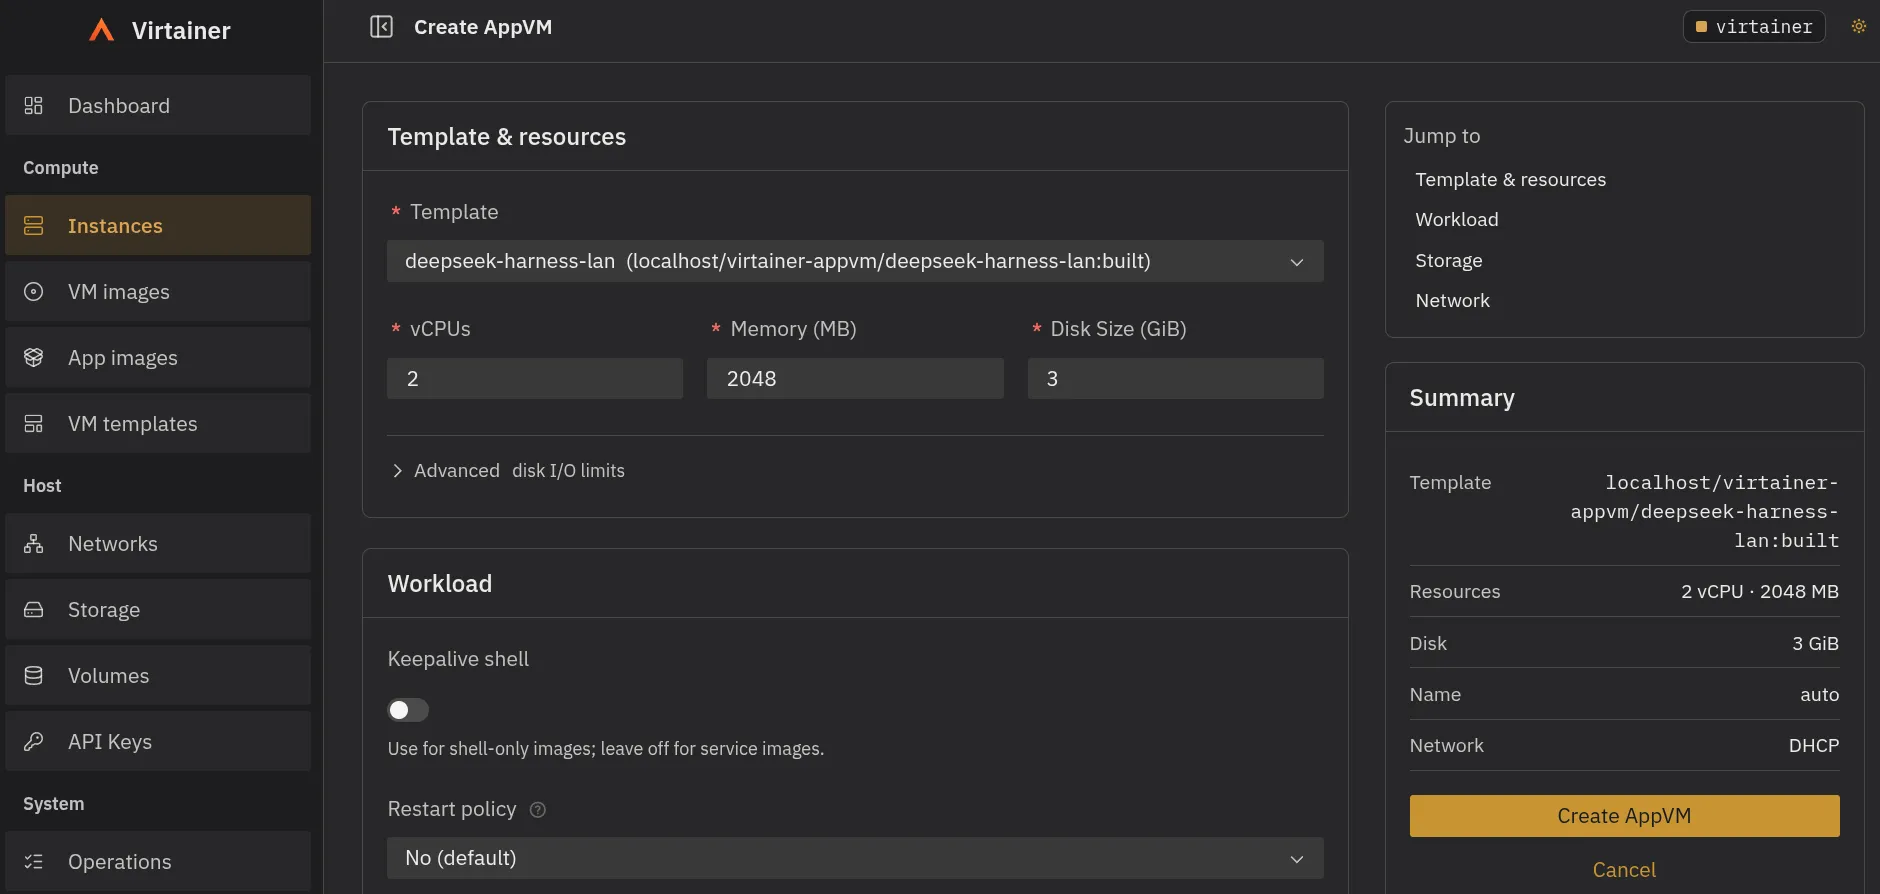
Two settings are worth changing deliberately. Leave Keepalive shell off, for
the reason its own help text gives: it is for shell-only images, and this is a
service image. Set Restart policy to on-failure, which is what connects the
HEALTHCHECK in the Dockerfile to real recovery.
Storage and Network stay as they are, so no extra volumes and DHCP on your VM network. Click Create AppVM.
The instance reaches healthy in under a minute and the list shows the address it took from DHCP. That address belongs to the VM, not to the host, so open it on port 3080 from whatever is nearest. A laptop, a tablet on the sofa, a phone. The agent is not running on any of them.
Step 3: Look from the inside
This is what those extra packages were for. Open the instance’s terminal and you land in a root shell on the guest:
# ip -brief addr
lo UNKNOWN 127.0.0.1/8
eth0 UP 192.0.2.24/24
# ip route
default via 192.0.2.1 dev eth0
# ss -tlnp | grep -E '3080|3081'
LISTEN 0.0.0.0:3080 users:(("nginx",pid=144))
LISTEN 127.0.0.1:3081 users:(("node",pid=141))
# curl -s -o /dev/null -w '%{http_code}\n' http://127.0.0.1:3081/
200
Read that against the diagram at the top. eth0 carries a real address with its
own default route, which is this being a machine rather than a process borrowing
a port on yours. nginx holds the network socket while dsh sits on loopback.
And curl against 3081 from inside proves the agent is healthy independently of
the proxy, which is the first thing you want to know when something breaks.
It is also the moment the isolation stops being an abstraction. Everything above is happening inside a computer that is not the one you are typing on.
Now open the URL in a browser, set a model API key under Settings, choose a workspace, and start a session.
Why the AppVM shape matters
The useful comparison is three-way, because an AppVM is not a better container or a lighter VM. It borrows from both.
| Aspect | Container | AppVM | Classic VM |
|---|---|---|---|
| Boundary | Namespaces on a kernel you share | Own kernel, own virtual hardware | Own kernel, own virtual hardware |
| What you ship | An OCI image | An OCI image | A disk image, then an OS install |
| Guest OS to own | None | None beyond the image | A full distribution you patch |
| First boot needs | Nothing | Nothing | cloud-init, keys, packages |
| Network identity | The host's, via published ports | Its own address | Its own address |
| When the app exits | The container stops | The machine stops, and you see it | Nothing. The OS keeps running |
| To ship a change | Build an image, redeploy | Build an image, redeploy | Patch in place, or rebuild by hand |
Read the middle column against its neighbours. It takes the packaging and lifecycle rows from the left, and the boundary and identity rows from the right.
Against a container, the boundary is a machine rather than a kernel feature. A container is namespaces around a process on a kernel you share, so the isolation is a configuration of the thing being shared. An AppVM has its own kernel and its own virtual hardware, and guest and host share no kernel to escape from. For young software that you are inviting into your files, that difference is the whole point. The blast radius is the disk you provisioned: no shared layer another workload mounts, no folder of yours mounted in for convenience.
Against a classic VM, there is no guest operating system to own. That is the cost people forget when they reach for a VM: a distribution to install, patch, and account for, on top of the thing you actually wanted. This filesystem came out of a Dockerfile you can read in one screen. There is no cloud-init, no keys to distribute, and nothing to converge into the state you meant, because the image is already that state.
The lifecycle is application-shaped too. A classic VM has no opinion about whether the software inside it is alive. Here the workload exiting stops the machine, and the health check from your Dockerfile drives recovery. Upgrades ship as images rather than as edits to a pet, which for a project promising breaking changes is exactly the property you want: build the new one, roll onto it, and roll back by pointing at the old image. The flip side is worth stating, a redeploy resets the root filesystem, so anything meant to survive belongs on a data volume.
And the client is now any device you own. This is the part that surprises people. The agent needed a real machine, so you gave it one, and the thing you actually sit in front of went back to being a browser. That is a better arrangement than the one where the most experimental software you run is installed on the laptop with your photos on it.
Notice which problems in this walkthrough were AppVM problems. The two fiddly ones, the header check and the missing browser function, were properties of a fast-moving application, and you would have met both putting it behind any proxy anywhere. What the machine gave you was the part nobody had to configure.
The middle ground between containers and VMs can be approached from either side, and the side you start from decides what you end up carrying. Coming from the machine side, isolation is not a feature you configure. It is what was already there.
For the reasoning behind the Dockerfile itself, that is the next post.